Monday, September 6, 2010

A Few Projects....


I have not been feeling well lately and i have an appointment with the Doctor on Wednesday to see what is up. I have Hashimotos Thyroid disease, an auto immune disorder/ thyroid issue.(my body is killing my thyroid gland) I also have suffered for the last probably 5 years from Fibromyalgia. So with all that and not feeling well...i have not had much energy to do much. So these projects have been going on for a few weeks and i finally finshed them up tonight.
The first project i have is a cute little 3x3 note card set. I stamped up this cute little snowman and painted him with my liquid snow. Added soem fun flocks to the scarf and colored with colored pencils and OMS. Added a plastic snowflake that i covered with some superfine glitter..(I will say...i feel like tinkerbell since getting this martha stewart glittler set.....i seem to be covered in glitter , i shed glitter and spread it allllllll around ....the stuff is fun...but a little annoying! LOL)I added a cute little wooden bead to the snowmans hat for some demention. The little purse was cut from my nestibilities set, cutting 2 sizes, and adding some coordinating paper for the handles and side panels. I added eyelets and these cute plastic snow flakes that i glittered up (or should i say they glittered ME up). Cute little set of 5 cards and holder. Will list it on etsy soon.

Also shown is a card i made tonight with my new stamps from Liliofthevalley. I love this little bear! I stamped him up and colored him with colored pencils and OMS. I also added alittle white fun flocks to his cap and some more liquid snow to the ground and sticklesto the snow flakes. I used an aged tag that i made with instant coffee and baked it in the oven. I then used the edge of one of my nestibilites dies to make the edge of the tag seem worn. I added a bit of vintage ink to add more age to it. Stamped Happy Winter and then clear embossed some snowflakes to it as well. I love how it turned out and might make another just like it to keep for myself. Will list this one as well on etsy.

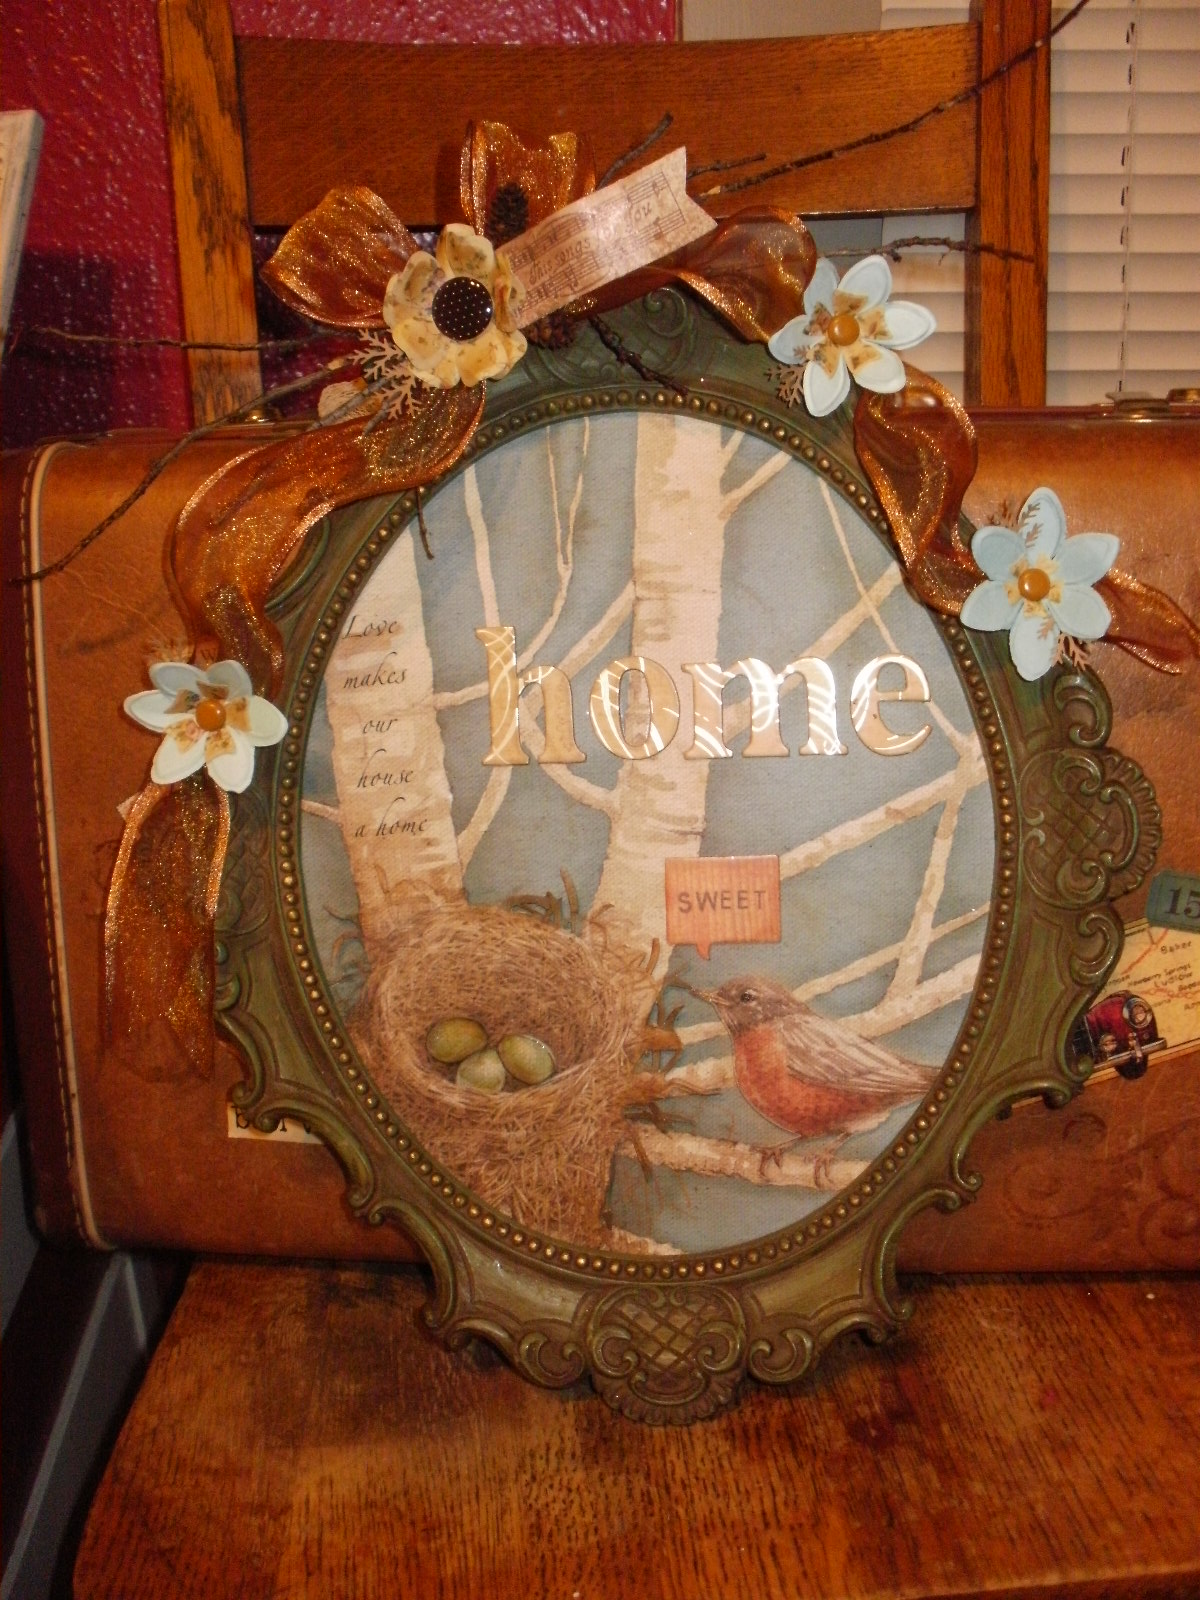
Then there is the frame i made up for Melinda. I have seen some cute vintage frames done up with bird themes so thought i would give it a go with what i had on hand. Melinda saw the beginnings of it and decided she wanted it! So that worked for me. I added some 3D effects, clear embossing on the eggs for some shine, the chipboard balloon with SWEET stamped to it and the chipboard letters spelling out HOME. I added some paper flowers i cut out with my nestibilites dies and embossed them and added a little ink to age them a bit, added some brads and a big epoxy dot to the main flower. Some rusty shiney ribbon, some pinecones, twigs and a little banner saying "this songs for you" which i aged with some tattered angels glimmer mist. So now all that is left is to do is box it up and mail it off!

Thanks for stopping by! I hope to find out what is making me so weak and get on with feeling better and getting things done! I hope to be back soon with some more cards from my new liliofthevalley stamps!

Tuesday, August 24, 2010

Watercolor Image Card


I wanted to try my hand at watercoloring (i use watercolor pencils) so i stamped this cute image on this nestability die cut, and embossed the edge too, using watercolor paper. I then took scrap paper and rubbed the color pencil colors i was going to use in the image onto the scrap paper so that i could wet my paint brush and then go in and wet the color i was going to use and then color on the image. It worked really well. I decided to make the back ground a bit grey , some blue, making it look like a cloudy rainy day. I added the image to matching papers, and machine stitched the blocks of color and the image to the background. I added a few dew drops and i made these paper roses out of the background paper to bring it all together. Adding a rub on sentiment. I LOVE this card! to cute, its got shiney paper, sparkle and charm!

Recipe Tin with dividers and recipe cards


I found this cute tin at the thrift store a few weeks back and decided I could cover it with some cute paper and give it new life! (was an old bisquick tin) I used one of my favorite lines of paper, Graphic 45 of course! perfect for this recipe tin! I mod podged the papers on after cutting them all to fit the tin, inside and out. Added a few "decorations" Love the prima flowers on top and used my new martha stewart branch punch, that i got for 1/2 price at walmart, since they are changing out the scrapbook isle. I will be sad it they continue the way they are going, because, they will probably no longer have a scrapbook isle! eegads. Anyways I think cut out 9 dividers, decorated them up with colorful matching tags on the tops, for the purchaser to add their catagories too. And then i decoraged them up with some vintage/retro brads and 3d items. To darn cute! I also made recipe cards to go behind each divider, some where close to 40 of them. So whom ever purchases it will be all set to start filling it with family favorite recipes!

Saturday, August 14, 2010

Just for fun


I found this suit case at the thrift store here in town, for $1. I thought i would bring it home and add a little fun to it and then i would use it to store some of my items in that i want to alter. I have frames, and other things that i dont know where to put and this would be a great place to put them in and still it would look cute.


Friday, August 6, 2010

Get Some Blog Candy!!


Here is some fabulous blog candy to try for over on All the things I love blog.......go sign up!!

Wednesday, August 4, 2010

Card Set In A Bag

SOLD!!!!!


I have been working on this cute card set in a matching bag for the past week. I LOVE how it turned out. I used a paper bag lunch sack , cut it down a little and added some cosmo cricket papers! I found a large chipboard flower and covered it with the cosmo cricket the tan side. Then used my large flourish stamp to stamp on the petals . I used The greeting farms stamps, 3 seasons, and colored them with colored pencils and OMS , added a bit of clear embossing here and there to give it a little texture and shine. I made it look like it was riped out of the center of the flower. Added matching ribbon and little chipboard flowers to the back eyelets for added strength and cuteness! Inside the bag is a set of 6 handmade matching cards and some envelopes. 2 of every image in the set.( 3 say "hello" and 3 say "thanks") One set opens from the bottom and one set opens from the side. Cards are around 4x5 in size. Chipboard flowers covered in matching paper and a rhinestone was added to each card, and on the winter season cards I added snowflakes with rhinestones as well. The bag and the cards were aged with ink to give it more of an aged/vintage feel. All cards also have been stamped to match the stamped images on the petals of the chipboard flower on the bag. All tying it together.
Thanks for stopping by! I hope to start a new project soon. Be sure to visit my etsy store, just click on my etsy shop right here on my blog!