This Blog is to share my creative works with friends. I hope you stop by often to visit and give me your feedback!!
Saturday, November 12, 2011
3 more book mark corners to finish off the order!
Finished the last 3 bookmark corners for my order. I had to wait for more printer ink to print off the rest of the images. So now a big sigh of relief....aaahhh. done. Im pleased with how they turned out.
Snow Globe Card Set with Tin
Altered Tin around 6x6. I covered with papers, painted the edges. I made up all these "snow globes" using round cards...cutting round piecies of paper in the auqa for the backgrounds, then i colored all the snowmen, and cut out the magnolia snowflake round. I had to get creative and i used some page covers and cut them into circles to fit behind the snowflake round. I added sticky 3d tape and then filled it with crystal glitter...and then stuck all on the circle. I used a tab templete for the bottom of the globe and put on both the front and back of the card so it would stand up. I added sending you a flurry of love sentiment on all. Topped it off with a black and white check bow!
There are 6 total cards and envelopes. I stamped the envelopes and the inside of the cards with a snowflake stamp.
Ill list these on etsy soon.
There are 6 total cards and envelopes. I stamped the envelopes and the inside of the cards with a snowflake stamp.
Ill list these on etsy soon.
Friday, November 11, 2011
Winter Fun First Aid Kit
I did up this tin , thought of it when i saw the Teddybobea_074 image! love the two of them sledding. I covered the tin with some cute mitten paper, along with a plaid. Then accented with some red glitter paper. I wanted it to look like a First aid kit so cut out the cross on the front. I think its so fun. I added a clear coffee mug, added a Cozy around the mug for some color and fun. Tied it on with some hemp string and eyelets. Threw in a pair of some fuzzy gloves i found at the hardware store down town, they are so fab! Colored the tag with some promarkes and added some stickles. added a bow and some rafia to the handle i covered with twill ribbon. I just think it turned out cute and is so fun! Wish i had more things to put on the inside, but that can be something she can add to the tin as well.
Wednesday, November 9, 2011
A couple journal pages.........
I am doing the Art , Heart, Healing class over at willowing.ning.com I am enjoying learning new techiques. I have already gone through Soul Restoration 1 and 2 with Melody Ross. So i wasnt looking for more of that....I love Tams talents and i wanted to learn from her. She has a class going on that is for the whole year long.......i couldnt afford that, and when i saw that she was going to be giving a free class..i jumped at the chance! At least i can get some of it....
So i wanted to share a couple pages i have done through her first weeks class Ideas and Techniques. both are done with water color pencils/ markers and a little bit of acrylic paint. I added some tissue paper to the Bee Yourself page to add some texture. I like it. Im hooked now!!! Ill be continuing with more of these pages i think!!! And keep watching her video tutorials to gain more techiques! im lovin it!!!
Tuesday, November 8, 2011
New Releases today over at Teddybo.com!
Winter is upon us...so thought this was appropriate and i know alot of people dont feel the same as i do..but i love winter, cuz i like to hibernate and i spend most of my hibernation in my craft room! I
took a piece of cardboard and peeled off the top layer showing the corrigate
under . Added some glitter snow paste all around and then some glue to the edges
and added some silver glitter...as of now it looks like a fairy exploded in my
craft room as there is silver glitter EVERYWHERE, even my dogs are waring a
touch of sparkle...im sure when i dress for bed, ill shed a bit there, spreading
the "goodness" thought out the land! lol Anyways i cute out more of my favorite
snowflakes , added to the piece and some glass baubles and dew drops. And more
glitter with glitter letters spelling out Snow Fun! I used Teddybo_151 , colored
with promarkers, adding some clear embossing powder to his nose and boots for
some shine, and some more of that glitter snow to the snow ball and the snow at
his feet for texture. This image is one of the new releases from Teddybo.com! run on over and check them all out!
Tuesday, November 1, 2011
New Releases over at Teddybo.com for this week!
Check out the cute new releases from Teddybo.com! Head on over and check them all out! Then make sure you check out teddybochallenge.blogspot.com for lots of cute ideas and inspiration!
Sunday, October 30, 2011
School Days Chipboard Tag Scrapbook Album
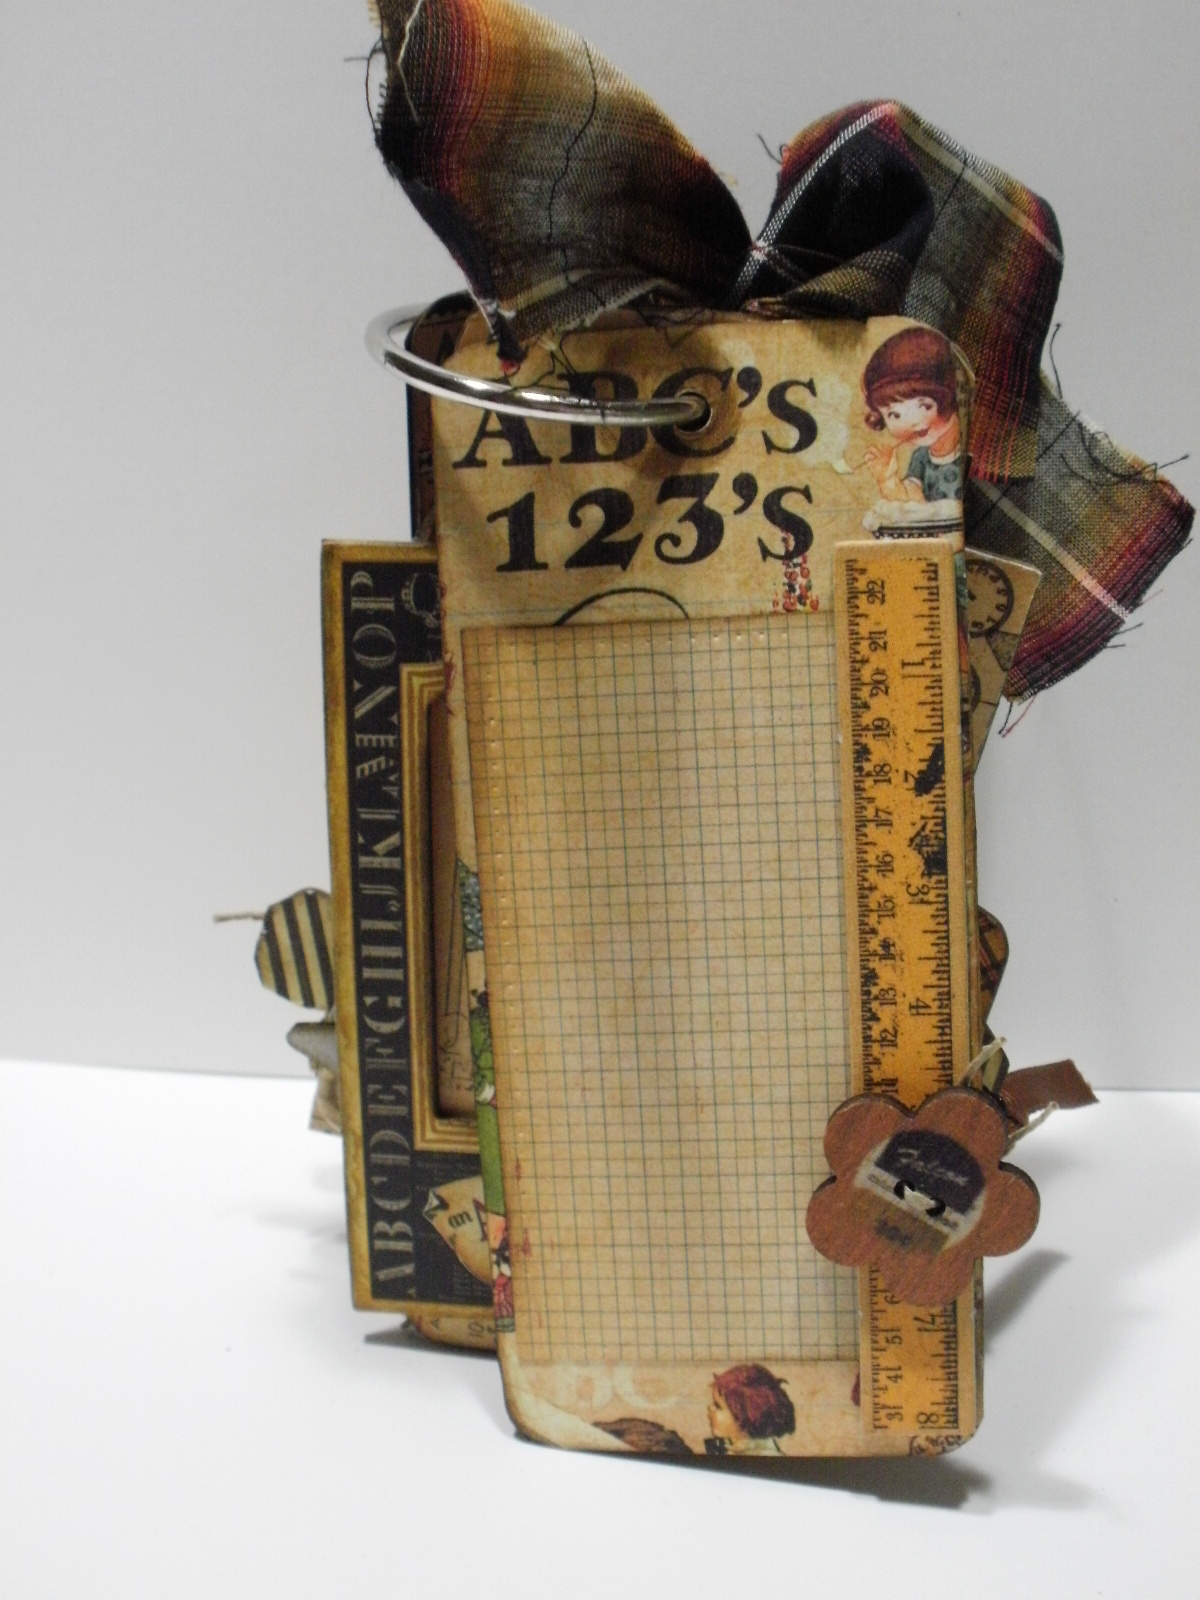
I just listed this 5 tag chipboard scrapbook album over at Etsy, you can find it HERE. This album is aprox 2x4 in size. Lots and lots of things to see in this album, made with the Graphic 45 papers. You know how i love Graphic 45!This first page has a place for a school picture, just slide it in! (as shown below) cute chipboard flower and a wooden button along with another smaller tag are the first page! All held together with a 2 inch ring adorned with some plaid fabric ribbon.
slide the picture in on the right side....using my son lukes last years picture as an example.
second page is a journaling page. I added some wooden buttons, fussy cut (i learned that phrase from another blogger...LOL) out the alphabet stamps and cute flash cards and stuck them on for decoration!
This 3rd page is another photo placement, just tuck in behind the tag as shown. I added a chipboard tag, which holds in the picture, some chipboard and wooden stars, along with a scrabble letter. I love the thrift store, found 2 boxes of scrabble games, and just took the letters out and use them for my scrapbooking/cardmaking/creating!
Here is the 3rd page with the picture removed.
The forth page is another chipboard frame added to the tag, with a chipboard clock, that i added a ribbon too.
example of picture behind the frame.
5th page picture placement, with the photo tab and slipping up under the chipboard telling time plaque. so cute. also a small round chipboard apple at the top right corner for fun!
my picture was a bit to big to show how it works , i didnt want to cut up this picture so you will have to use your imagination and size a picture to fit!
You could totally journal on this page and then slip a picture over top, just stick it under the chipboard ruler. I added a wooden flower button for some demention!
Here is another example of how it could look.
there is a little tag that hangs in front of this page. great journaling spot!
7th page is a tag page, lots of journaling space on the tag and behind the tag. Could even tuck something else in the chipboard pocket. The tag is aged with coffee/vanilla blend, baked in the oven.
Another journaling page, lots of room to add classmates names!
photo placement, with a small hanging tag. just tuck in behind the chipboard alphabet tab. added some scrabble letters and a little hemp bow. (example of photo placement below)
This last , back page is a great page to personalize it, it say this book belongs to ....Thanks for stopping by! check out all my listings on etsy and remember i do do special orders on albums etc. Just ask!
slide the picture in on the right side....using my son lukes last years picture as an example.
second page is a journaling page. I added some wooden buttons, fussy cut (i learned that phrase from another blogger...LOL) out the alphabet stamps and cute flash cards and stuck them on for decoration!
This 3rd page is another photo placement, just tuck in behind the tag as shown. I added a chipboard tag, which holds in the picture, some chipboard and wooden stars, along with a scrabble letter. I love the thrift store, found 2 boxes of scrabble games, and just took the letters out and use them for my scrapbooking/cardmaking/creating!
Here is the 3rd page with the picture removed.
The forth page is another chipboard frame added to the tag, with a chipboard clock, that i added a ribbon too.
example of picture behind the frame.
5th page picture placement, with the photo tab and slipping up under the chipboard telling time plaque. so cute. also a small round chipboard apple at the top right corner for fun!
my picture was a bit to big to show how it works , i didnt want to cut up this picture so you will have to use your imagination and size a picture to fit!
You could totally journal on this page and then slip a picture over top, just stick it under the chipboard ruler. I added a wooden flower button for some demention!
Here is another example of how it could look.
there is a little tag that hangs in front of this page. great journaling spot!
7th page is a tag page, lots of journaling space on the tag and behind the tag. Could even tuck something else in the chipboard pocket. The tag is aged with coffee/vanilla blend, baked in the oven.
Another journaling page, lots of room to add classmates names!
photo placement, with a small hanging tag. just tuck in behind the chipboard alphabet tab. added some scrabble letters and a little hemp bow. (example of photo placement below)
This last , back page is a great page to personalize it, it say this book belongs to ....Thanks for stopping by! check out all my listings on etsy and remember i do do special orders on albums etc. Just ask!
Subscribe to:
Posts (Atom)