Sunday, October 30, 2011

School Days Chipboard Tag Scrapbook Album

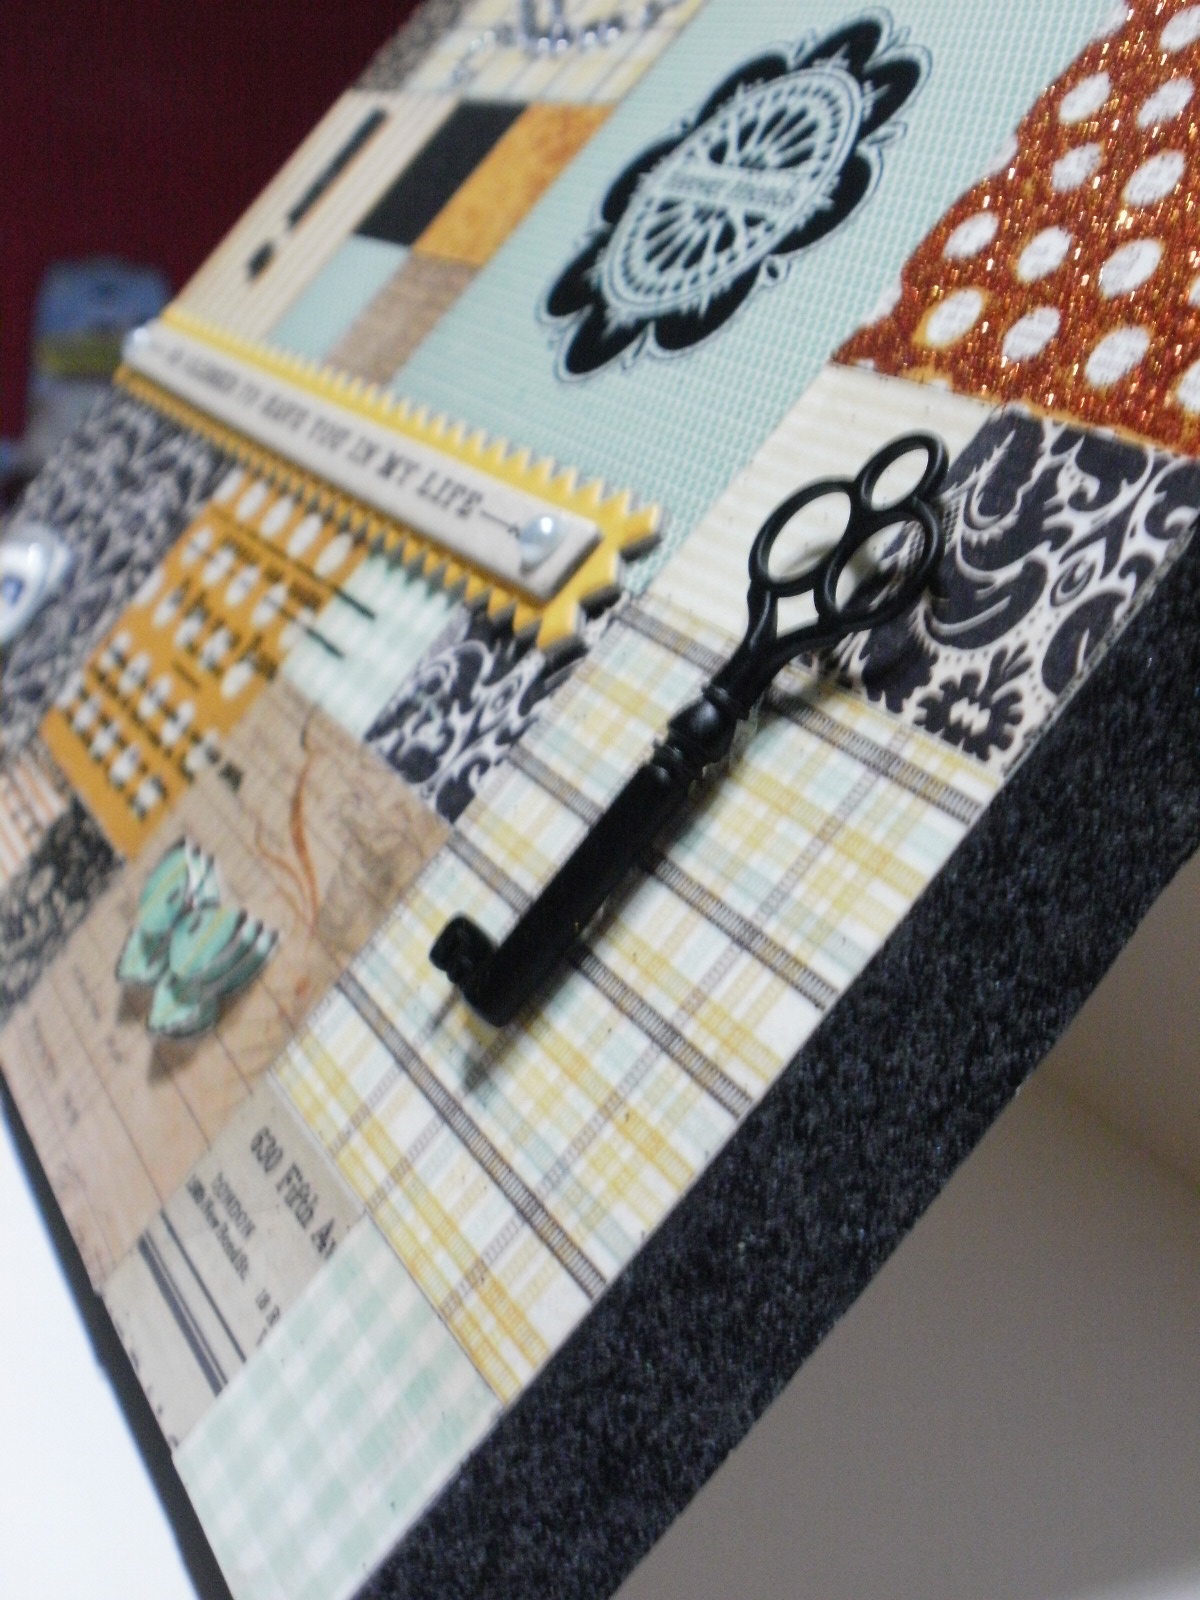
 I just listed this 5 tag chipboard scrapbook album over at Etsy, you can find it 
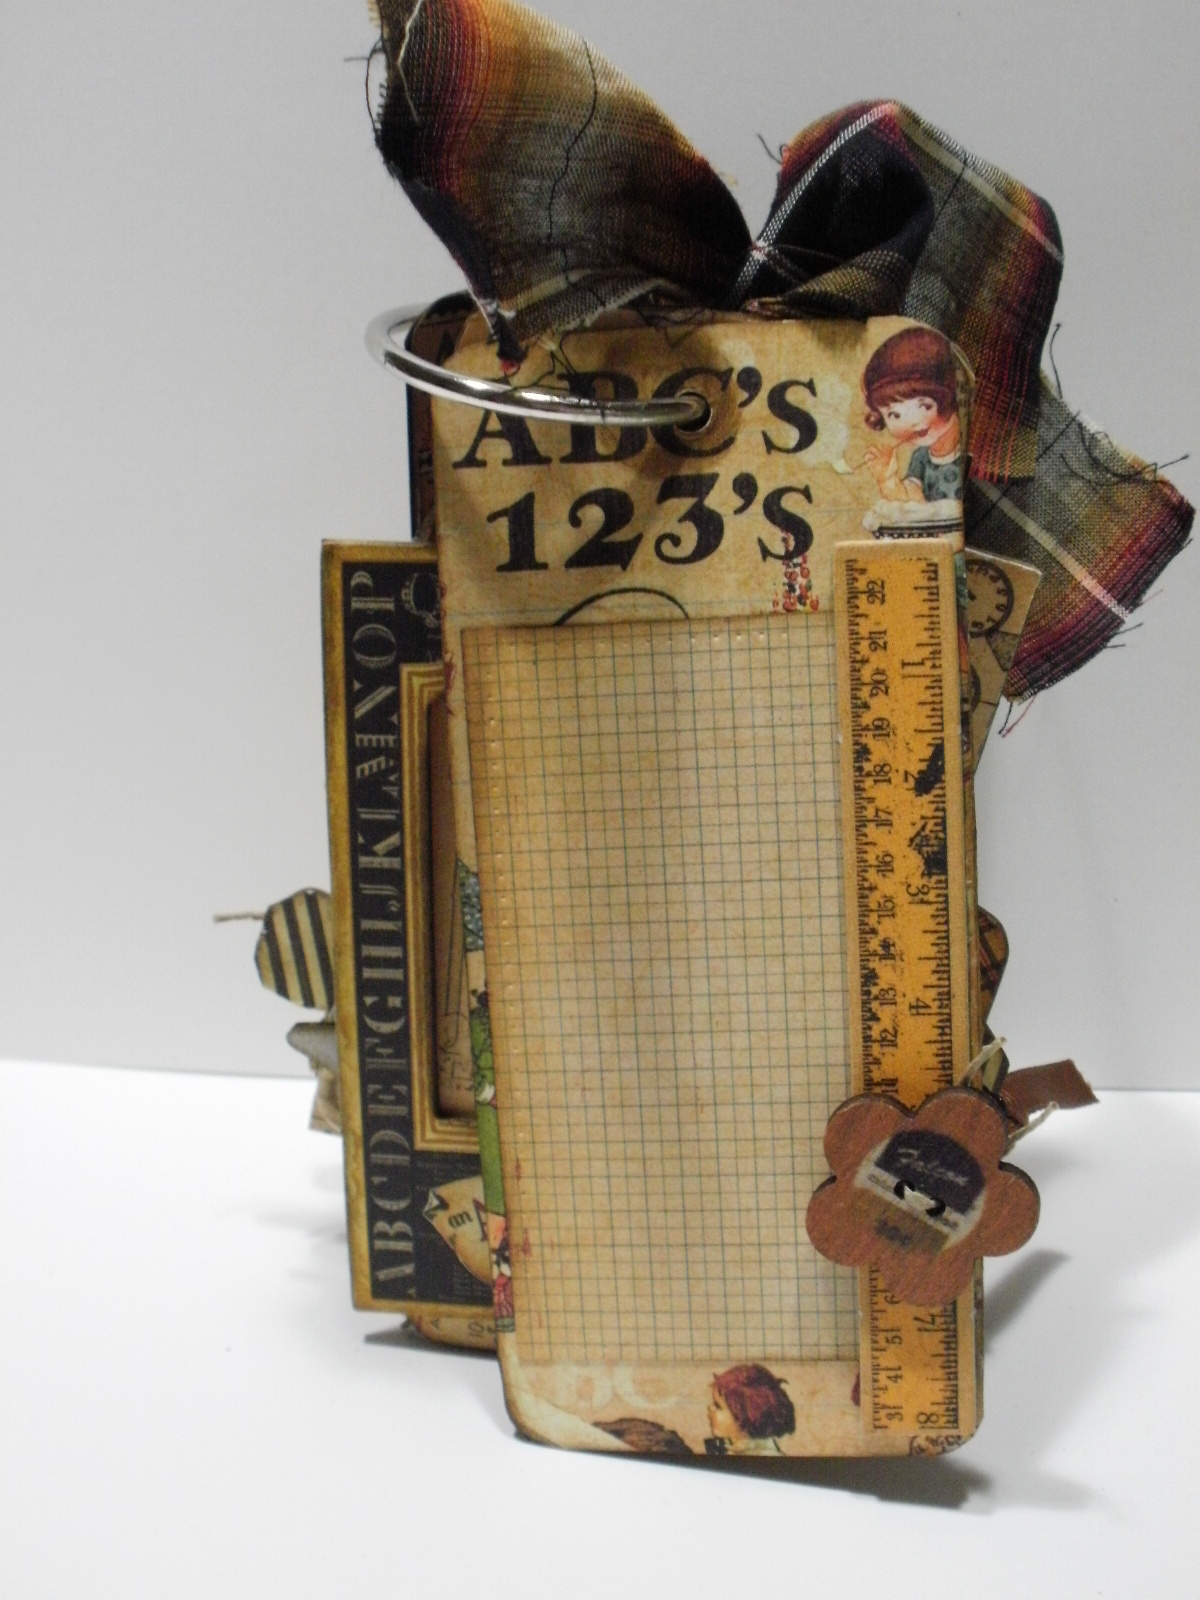
HERE.  This album is aprox 2x4 in size. Lots and lots of things to see in this album, made with the Graphic 45 papers. You know how i love Graphic 45!This first page has a place for a school picture, just slide it in! (as shown below) cute chipboard flower and a wooden button along with another smaller tag are the first page! All held together with a 2 inch ring adorned with some plaid fabric ribbon.
 slide the picture in on the right side....using my son lukes last years picture as an example.
 second page is a journaling page. I added some wooden buttons, fussy cut (i learned that phrase from another blogger...LOL) out the alphabet stamps and cute flash cards and stuck them on for decoration!
 This 3rd page is another photo placement, just tuck in behind the tag as shown. I added a chipboard tag, which holds in the picture, some chipboard and wooden stars, along with a scrabble letter. I love the thrift store, found 2 boxes of scrabble games, and just took the letters out and use them for my scrapbooking/cardmaking/creating!
 Here is the 3rd page with the picture removed.
 The forth page is another chipboard frame added to the tag, with a chipboard clock, that i added a ribbon too.
 example of picture behind the frame.
 5th page picture placement, with the  photo tab and slipping up under the chipboard telling time plaque. so cute. also a small round chipboard apple at the top right corner for fun!
 my picture was a bit to big to show how it works , i didnt want to cut up this picture so you will have to use your imagination and size a picture to fit!
 You could totally journal on this page  and then slip a picture over top, just stick it under the chipboard ruler. I added a wooden flower button for some demention!
 Here is another example of how it could look.
 there is a little tag that hangs in front of this page. great journaling spot!
 7th page is a tag page, lots of journaling space on the tag and behind the tag. Could even tuck something else in the chipboard pocket. The tag is aged with coffee/vanilla blend, baked in the oven.
 Another journaling page, lots of room to add classmates names!
 photo placement, with a small hanging tag. just tuck in behind the chipboard alphabet tab. added some scrabble letters and a little hemp bow. (example of photo placement below)
This last , back page is a great page to personalize it, it say this book belongs to ....Thanks for stopping by! check out all my listings on etsy and remember i do do special orders on albums etc. Just ask!

Friday, October 28, 2011

Goodnight Moon! Frame

Hello everyone! I got this cute round frame with a concaved piece of glass in it from the thrift store here in town, it was .25cents! So when i saw the teddybo_081 i knew i had to use it in that frame! I used the october afternoon campfire paper with the stars for the back ground and then colored the teddybo/bea with my promarkers, used pop dots to make them 3D, added some stickles to show off the moon and the glow on them from the moon! I cut up strips of card stock to look like grass. And added some basic grey letters. I think it turned out sweet. It also reminds me of a norman rockwell painting....with the boy and girl on the swing looking at the moon. I painted that in art class one year in high school! lol. Just thought i would share this! Hope everyone has a fantastic weekend.

Tuesday, October 25, 2011

Here's whats new at Teddybo.com this week!

 Here are the new teddybo.com images for release today!!!
 I made this card from the Teddybea_161 image. Isn't it cute?  I used Stampin Up! Paper, well worn. Colored with Promarkers. I used Ice Stickles for the snow and snow flakes. Clear Dew drops for snowflake centers. I cut the snowflakes with my whimsy stamps winter's jewel 1 die. And the smaller with the martha Stewart punch.
Here is a peek at the inside! Now head on over to Teddybo.com and check all their images! And pop in to The Teddy Bo challenge Blog and see whats happening there!

Monday, October 24, 2011

Wall Pockets

I found this Wall Pocket/Magazine rack, what ever you want to call it ! It hangs on the wall and has 2 pockets! lol It was a brown wood color...and so i was going to paint it, but i am so into 'inchies' i thought i would just cover it that way! And i LOVE it. Bailee helped me put the pieces on. She had fun with that! I also added a bit of white paint on the edges to cover where the wood might of peeked through but to also give it an aged look. I love it! A bit of Shabby Chic! I then had miss Bailee load it up with my flower packets and my rolls of fabric! easier access! LOVE LOVE LOVE when you find things at the thrift store and you can make them into something fab. It was 2 dollars! And its heavy! So i think it was a great buy!

Sunday, October 23, 2011

A Special Birthday Gift For a Sweet Friend...

 I made this "inchies" plaque for my dear old friend vicky! Vicky and i have been friends for over 27 years I imagine. So that makes us...old friends! lol Anyways, she is a special person to me and i wanted to make her something special. I hope she will like it. I love this paper. MME Lost and Found 2. I may have to get more of this paper too....only bigger! lol I cut out the 1, 2, and 3 inch squares. I make it easy for myself and I make a grid on my piece of wood of 1 inch squares. That way when i lay it out, it all lays out easy and even. It takes a little bit to lay it out to make it look even but its fun!I then mod podge it all in place and then mod podge over the top and let it dry. I also cut some black glitter paper for the edges  to give it more of a finished edge. I added a couple of the chipboard stickers from the same company as the paper, a metal key, a 3d butterfly, a glitter exclamation point a die cut rolled rose and a flourish of rhinestones. I stamped on it too here and there, the lovely was in the paper already, and i cut it out so that it would be one of my squares. The crown no. 1 is a stampin up beau chateau side note. I used it for 2 reasons....one...she is a stampin up demonstrator. And 2 she is from England orignally so i thought the crown suited her! The exclamation point is just because i think she ALL THAT...and i made her a glass dome with her name under to personalize it even more.
 I added Martha Stewart glitter to one of the polka dotted papers for a bit more pop and it ties in with the glitter edges.
 view of the sides and the demention of the plaque.
personalized....I hope she likes it. I love the colors of the auqa and yellow and black. Its fabulous just like she is!
I made her this matching card also with inchies....the image is from SaturatedCanaryDigis  Hugs to you Vicky! I hope your birthday is Fab~!

Thursday, October 20, 2011

Clean and Simple Card Challenge over at TeddyBo.com

Well First a little Announcement!!! I was asked to be on the design team over at Teddybo.com!!!!!!!!!!!!!!!! I am so excited about this , I have been  pinching myself to really see if it is so! And ....it is! I love this digi stamp Co. I am addicted to those bears!

My first assignment along with the other girls for this challenge was to make a clean and simple card.  I used the TeddyBea_075 image for this card. I colored with my promarkers. Added some stickles for some sparkle, you just have to have some sparkle!  A piece of scrapbook paper and 2 rows of ribbon. Thats as simple as it gets!
Head over to TeddyBo&Co and check them out. Stop by TeddyBo.com and yourself some of these fabulous images!

Two New Chipboard Albums For Sale!


I have made up these 2 pretty chip board albums to list on Etsy! Each Album is made up with 4 pieces of differently shaped chipboard. So you have a total of 8 surfaces counting front and back covers. There are 6 places to place or tuck in a photo, and 2 handmade coffee/vanilla stained tags in each album. The paper us YUMMMY! It is DCWV La Creme. I bought the matstack and I totally love this paper!!! i may have to find more. oh my! I used gold metalic ribbon on one album with the Our Story Theme, with lots of rhinestones . The clear stickers are from creative imaginations and they have embedded rhinestones in these epoxy stickers.  The second album has a creamy ribbon with the theme of The Good Stuff. Again lots of rhinestones and in both albums i used some of the rose trim...fabulous! Black velvet ribbon to match the velvet papers. These are so darned pretty. When i get a minute i will list them over on etsy, check them out!

Tuesday, October 18, 2011

Special Order 12x12 Baby Album Scrapbook

 Album is a chipboard cover front and back with 12x12 paperbag pages. First one i have made this size and with these 2 elements together. I had to make a binding which you cannot see, but trust me its fabulous! LOL  Anyways.....The paper is called Baby Steps by simple stories, and it is fantastic and fun to use!lots of bling and flowers and ribbon through out.
 Here is a journaling card and there is a big pocket there at the bottom for tucking in those special things. Dont you love the trim...cream roses.....
 A place to fill in the babies name, birth date, etc...and pockets for 2 pictures, more bling and flowers!
 Pocket page, slips into the pocket of the paper bag. I used the cards that have you fill out each month babies milestones, weight etc...and made them into pockets , so you can tuck a picture along with the milestone!
 more pocket, milestone cards on back side.
 large picture placement with bling and cute cards, stickers
 2 more picture placements and more of the trim....in brown....so lovely. 2 tags behind the picture placements too!
 more pocket milestone cards on the second pull out page
 and more!
 sorry the pics are the best...next 2 pages with picture placements and journaling spots, i did little clothes pins to hold in the pictures had to add some glitter glue to them!
 9th and 10th month milestone pockets....
 and 11th and 12th month as well on the back side of another pull out page.
 2 large pocket pages with 4 large tags for pictures and journaling, and 3 more picture placements one large on the left page, and 2 smaller chipboard on the right. lots of bling and flowers and buttons.
 The last pull out page has happy birthday on it, with a cute pop out cupcake for demention. Great place for the first birthday picture! A little journaling place as well.
 Picture placement and journaling spots on the back side.
Last 2 pages have 2 picture placements, just tuck in behind the ric rak , and 2 places for journaling. 4 small journaling cards tucked in a little pocket at the bottom. trimed with the yellow rose trim...its so yummy and sweet!
I hope that you love it Lynn and I hope that the recipient loves it too! It was fun fun fun. Thanks everyone for stopping by!